What is a digital menu board?

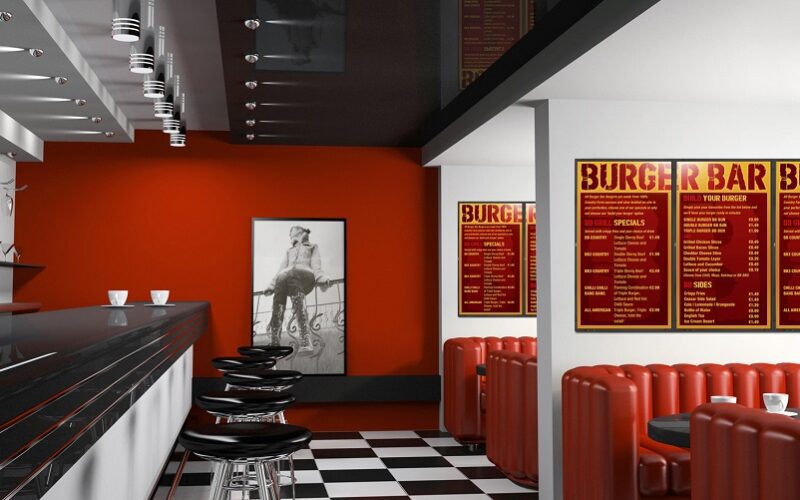
Restaurants, cafes, fast food businesses, retailers, and hotels around the world are all starting to use digital menu boards to list their menu items. Why? Because they’re an eye-catching and dynamic way to list menu items, prices, and promotional information.
As humans, we’re naturally drawn to pay more attention to moving objects, and the animated graphics on a digital menu board trigger this instinct, to grab – and keep – the customer’s attention.
In this guide, we’ll take a look at exactly what a digital menu board is, how it works, and some other questions like how to update a digital menu board, to tell you all you need to know about this fantastic piece of kit.
What is a digital menu board?
First of all, let’s clear up a common misconception: digital menu boards don’t use special hardware. In most cases, they’re the same as any normal digital signage. It’s all about the content you display and where your menu board is placed.
Digital menu boards can have the same features as other digital signs. Weatherproof enclosures mean they can be put outside, touchscreen displays can make them interactive, and the option of integrated self-service payment processors can allow customers to place orders directly via the screen, if you have the right hardware and software.
Let’s look in more detail at the different parts that go together to create a digital menu board and display its dazzling content…
The five components of digital menu boards
You can think of digital menu boards as a collection of component parts:
 Screen

The screen itself should be a commercial display – not a domestic television. Some of the key differences include:
- TVs are not designed to be turned on at all times
- TVs usually don’t have the functionality to allow you to control them remotely
- TVs probably won’t be anywhere near bright enough for use in window displays or outdoors (and often not in a brightly lit room)
If you’re putting your menu board outside, you’ll want a commercial display that’s designed to be visible in full daylight instead (these are called a highbright screens), with a weatherproof enclosure (see below).

Media Player
Other hardware you’ll need includes the media player, which is a small but powerful computer that sends the content through to the screen. This is sometimes integrated into the screen itself, but usually comes as a separate, standalone device.
Enclosure
Commercial screens aren’t cheap to buy so you’ll need hardware to keep them safe. This can be a wall-mounted or freestanding enclosure to protect the screen. Alternatively you can use mounts to attach your screen and media player to the ceiling or wall (usually above a food counter where it’s out  of reach by the public).
There are lots of different types of enclosures and to ensure that people use the right type of outdoor use, they’re given an Ingress Protection (IP) rating which tells you what protection they give from moisture and dust.
As a general rule, IP43 is best for general indoor use, and IP55 or IP65 are for outdoor use.
Enclosures can be purchased off-the-shelf or designed and made to order to ensure they’re consistent with your brand.
Software
To tell your display what content you want to show, you’ll need CMS (Content Management System) software, which allows you to upload your images and video files to create a library of media files, and to pick what content is displayed on your screens, where on the screen it appears, and when. It can also be used to select and connect third party content like social media or websites to your display and show them on your screen/s.
Digital signage software (like our own SaturnVision CMS) is usually priced on an annual licence per screen, so you just pay for licences for the number of screens you use.
Network Connection
Finally, you’ll need a way to load content into the CMS and send it through to your screens. While you can do this using a direct cable connection and/or a USB flash drive, most modern digital signage software is cloud-based, so that you can use an internet connection instead.
Some kind of connection is essential, so that you can change what’s shown on your screens and manage your CMS content remotely as and when you need to.
Note: If you’re on a tight budget, only have one site, one screen, and a limited amount of content, you could use a USB memory stick to load the content (rather than a CMS and Wi-Fi connection), but you will be very limited in what you can do on-screen, and might find a static sign such as a lightbox is the better option.
How do menu boards work?
Digital menu boards work like any other digital signage. The big difference is in how you design your content, and the information you include.

Creating Your Content
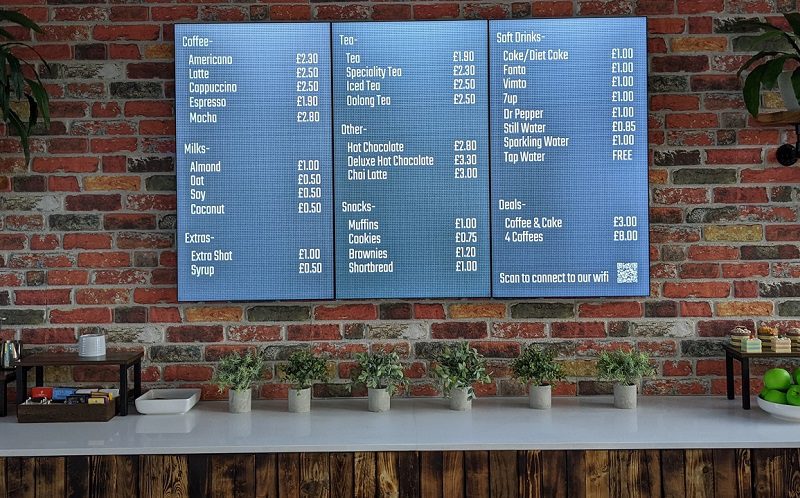
Unlike static displays, digital menu boards are very flexible. They can show a simple price list with names, prices and pictures of the menu items.
Alternatively you could do any of the following:
- Highlight new products and dates of limited edition items/specials
- Show recipe USPs (e.g. ‘secret sauce’ claims)
- Highlight promotions (e.g. meal deals)
- Flag up discounts (students/families/OAPs)
- Show calorie/nutritional/allergen information
- Highlight options available for people on restrictive diets (e.g. vegans, gluten-free)
- Talk up the quality of your ingredients
- Highlight pre-ordering/delivery details
- Showcase corporate social responsibility claims (e.g. sustainability, animal welfare)
It’s a list that can go on and on and shows the incredible versatility of digital menu boards. Remember, because your digital menu can show a slideshow of images and/or video, you’re not limited to what you can fit onto a display at any one time. Furthermore, you can use clever animation to highlight and showcase your most profitable menu items.
If you have more than one screen you can show different content on different screens at the same time or show content across several screens making them look bigger and more eye-catching.
Using one or more screens can also allow you to change the level of detail you provide. For example using one screen to show your price list and other to showcase promotions and product quality info.
Ideally you should use graphic designers that are experienced in creating content for digital menu boards
Note: Your CMS platform might have a built-in app to create menu content without using a graphic designer. This may reduce your content creation costs, but is usually a very basic option and barely a step up from a static lightbox menu. If you’ve bought the hardware, it’s worth making that small extra investment to get professional ‘hero shot’ graphics that really sell your most profitable items at their best.
Adding Your Content
Once you have your ‘assets’ (your pictures and video) created to the right size and orientation for your screens, you upload them to your CMS and save them in your media library. If you only want to use your content for a limited period (e.g. a half term price promotion) you can set an expiry date for it so it will automatically be removed from your displays after that date.
Then you need to use your CMS to create a playlist (this is similar to creating a playlist in Spotify). You just need to pick the images and video you want to display, and put them into the right order that you want them to appear in.
Then you need to schedule your content, so you need to select the playlist/s you want and the days or times when you want it to show. This can be on days of the week and times or regular intervals.
When you publish your schedule, the CMS and media player will make sure that the screens show the right content at the right time, e.g. breakfast menu until 10am, lunch deals at 12pm-2pm and so on.
Without CMS software, you may be able to display content by plugging a USB pen drive directly into the display, but you won’t be able to schedule different content for different times of day, so you lose some of the most useful uses of your digital menu board as a result.
Software Development
Many businesses find that it’s useful to integrate their digital menu board and EPOS system so that the prices on their displays are updated automatically. To do this you’ll need to hire a professional software developer to set it up. Whilst this may increase your set-up costs, if you have a large menu and change your prices a lot, it can be a fantastic help.
Interactive Menus
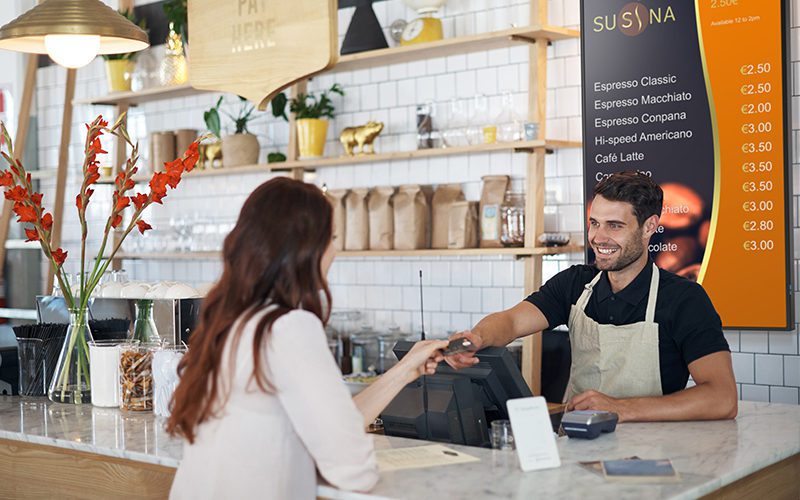
 Two-way screens (more commonly known as touchscreens) allow you to turn your display from a digital menu into a complete order and self-payment kiosk, reducing pressure on your front-counter staff at busy times.
Some things to remember when creating interactive menus:
- A self-payment touchscreen kiosk will need a special type of enclosure with a built-in card reader, and software capable of processing card payments
- An outdoor kiosk will need to be secure and weather-resistant, with an enclosure rated for a higher level of Ingress Protection (e.g. IP65)
- Your software developer will need to create the interactive interface that allows customers to choose items from the digital menu via touch
All of this is a bigger investment upfront, but in return you get a much higher level of customer engagement. Diners are able to browse items in more detail, so you’re more likely to get orders from people with special dietary requirements or allergies.
Interactive screens that respond to the customer’s choices also offer a much more direct way to upsell orders, by prompting the user to upgrade to a larger meal, add sides and dips, or include a dessert with their finished order.
Lifespan
Commercial grade screens should come with a minimum of a 3-year warranty from the manufacturer, giving your business the protection of a repair or replacement if you have any technical problems during that time.
Be wary of poor-quality hardware with a shorter warranty (e.g. 12 months) as, if the screen fails in little over a year, you may be left footing the repair bill or paying for a replacement display.
Any hardware you buy for your business is a trade-off between upfront purchase price and future running costs, but it’s worth buying the best you can afford if you want visually appealing menu boards that will remain reliable for several years.
Pros & cons of using menu boards
We’ve looked in detail at the different component parts of menu boards and how they work – now let’s run through some of the biggest pros and cons of using menu boards in your foodservice business.
Pro: Quick and easy to update
Unlike printed signs, if you need to make a change to your digital menu boards you can just amend the media files, upload and swap them without any printing costs or delivery timeframes to worry about. By integrating with your EPOS software, you can also make sure that any changes to your EPOS prices are immediately reflected on your menus.
Pro: Consistent at multiple locations
If you have more than one business location, you can change the content on your delays at once. This means you can keep your menus consistent across all of your outlets and make changes quickly and easily. That doesn’t mean your content needs to be identical though, as you can put different displays into groupings and have different playlists and schedules for each one, which is useful for outlets with different pricing.
Pro: Marketing messages and extra info
Menu slideshows, animations and full-motion video give you more opportunity to include additional information like ingredient quality and ethical/sustainability statements, or special menus without cluttering up the available space on your display at any one time. This can make your business more appealing to different types of customers – e.g. families, vegans/vegetarians.
 Pro: A/B testing
Unlike static signs, you can A/B test your content, so you can create different versions of your content and show them on different days to find out which version people respond to best. You can continue to refine your menu content and adjust your use of simple price lists, marketing messages and close-up product photography to maximise your revenues.
Con: Upfront cost
There’s no getting away from it, digital menu board displays cost more upfront than a printed menu sign or backlit menu lightbox. If you have lots of screens, touchscreen kiosks and outdoor enclosures to buy, this upfront cost will be bigger. Once installed, you’ll need to factor in the electricity to power the screens and media player, and money for annual software licences for each screen, and graphic designers to create new eye-catching content for you to upload (though you would still incur graphic design costs with static menus).
Con: Future admin
Aside from the cost, there is admin involved with the process of creating new content (and getting it approved), creating new playlists and scheduling them, especially if you have a large menu and a lot of promotions. Though it is possible to outsource content management to third party agencies.
Conclusion

Digital menu boards aren’t for every business, as there are some substantial upfront costs and ongoing running costs to bear. But for modern foodservice businesses, they’re a powerful way to stand out from the crowd, and make frequent menu updates much easier.
Once your hardware is installed and you’ve got to grips with asset creation, EPOS integration and using your digital menu screen’s CMS, there’s great potential to market your menu items at their best, to run limited editions and other promos, and to try A/B testing to optimise your sales.
Just remember to apply what you’ve learned in this guide, when it comes to choosing good-quality hardware and the right IP rating for your enclosures.
If you’re interested in learning more about digital menu boards or would like a quote, just drop us a line.
Interested in learning more about digital menu boards or retail digital signage? Why not check out some of our other blogs?
https://saturnvisual.com/what-is-digital-signage/
https://saturnvisual.com/service/software/
https://saturnvisual.com/five-retail-digital-signage-solutions/
https://saturnvisual.com/why-use-digital-menu-boards/
Ready to make an impact?
Get in touch now for competitive prices, good advice, & slick project delivery